EasyDIY
Paper A Feature Wall
You will need:
- Scissors: For trimming wallpaper to size before application.
- Wallpaper paste: An adhesive agent used to stick the wallpaper to your wall.
- Roller: For smoothing out and covering the wall with wallpaper.
- Brush: For covering the paper with wallpaper paste prior to application.
- Wallpaper knife or stanley knife: Essential for trimming surplus wallpaper at the floor and ceiling.
- Sandpaper: You will need this for preparing the wall prior to application of wallpaper.
- Sponge or cloth: Use to initially clean the wall and wipe away excess paste.
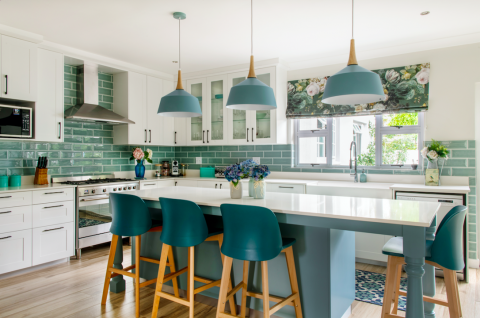
Wallpaper is enjoying a renaissance in home decoration and, with the many patterns and finishes now available, there’s something for every taste and budget.
After decades in the wings, wallpaper has once again taken centre stage, re-emerging as a dramatic design statement. From colourful bold floral prints to shimmering metallic designs, the latest in wallpaper patterns range from innovative to classic prints. When applied in small doses, such as on a feature wall, wallpaper can provide immediate impact, turning a neglected corner or wall into a space embodying instant style and drama.
In terms of application, wallpaper has seen a major shift in recent years to become non-fuss and easy to put up. Forget mixing messy solutions and extended drying time, the new wave of wallpapers are fuss-free and simple to apply. These days, the trickiest thing about wallpapering your walls will be selecting a design from the abundance of exceptional prints on the market.
Choosing the space
Before you start to look at pattern and colour, consider the use, size, height and natural light or lighting of the room you want to wallpaper. Once you have decided on where, consider the size and proportions of the space.
Covering just one wall with your chosen wallpaper will create a dramatic focal point, without overpowering the rest of the room. It’s important to remember to use wallpaper in moderation, to stop a modern style statement turning into an overdone nightmare of pattern and colour. When it comes to wallpaper design and application, less is definitely more.
Choosing a pattern
When selecting a pattern, consider the mood you want to achieve in the space. For a soft look, opt for
a delicate pattern, but if you would like to make the feature wall a real statement, select a striking graphic pattern in bold colours.
The scale of the pattern is of equal importance – as a general rule, the larger the space, the bigger the pattern can be. On a practical level, heavily patterned wallpaper can help hide flaws and uneven wall surfaces. In spaces such as children’s rooms or hallways, select heavy-duty wallpaper, which is easier to keep clean.
Types of wallpaper
Textured can add depth and warmth to a room.
Metallic is a quick way to add some glamour and glitz to your space. It’s ideal for dramatic dining areas or moody living rooms.
Bespoke companies provide a hand-printed custom-made wallpaper design service. This means you can have the perfect colour and pattern to match your space.
Luxurious paper-backed, including opulent materials such
as silks, felts and wools. Using different finishes and materials will bring a tactile dimension to a space.
Step by step
Here’s how:
Step 1: Prepare the walls for application. The walls will need to be clean, dry, smooth and even. Uneven surfaces will need to be filled or sanded. Use sandpaper to remove loose paint or repair uneven plaster.
Step 2: Mark a straight, vertical line on the wall to ensure that the wallpaper will be hung straight. Mark the line from the floor, as the floor will generally be more even than the ceiling. Be certain to check that the wallpaper rolls have the same batch number before applying – this will ensure consistency of colour and pattern.
Step 3: Cut the length of wallpaper required, leaving it approximately 10cm longer than the length of the wall to ensure you cover the wall precisely and are able to match the pattern for the following rounds of application.
Step 4: Turn the paper over and, using a paint brush or roller, apply an even coat of paste on the entire back surface of the paper, ensuring it is evenly covered, especially the corners.
STEP 5: Fold each end of the wallpaper to meet in the middle and allow the paper to relax for around 10 to 15 minutes. This stage will enable the paper to “stretch” and absorb the glue.
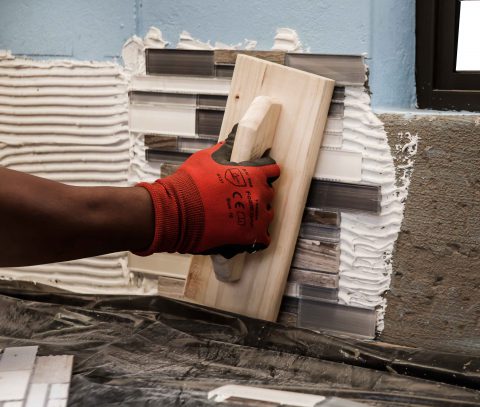
STEP 6: Press the wallpaper onto the wall from the ceiling down. Smooth the paper from top to bottom with a dry cloth to remove any bubbles.
Step 7: Cut away the surplus paper at the floor and ceiling using a wallpaper knife or sharp blade. Continue with the next piece of wallpaper. Make sure the lengths of wallpaper are butt-joined – edge meeting edge – and not overlapping.
Step 8: Use a clean damp cloth or sponge to carefully wipe away any excess paste on the surface of the paper. Remember, don’t apply too much pressure, rub the wallpaper or use a cleaning agent.